Image compression is supposed to make your images lighter and faster — not blurry, pixelated, or distorted. But many people unknowingly make mistakes that permanently damage image quality.
Whether you’re optimizing for websites, job portals, email attachments, or social media, avoiding these common compression errors can save your visuals from looking unprofessional.
Let’s break down the biggest mistakes and how to avoid them.
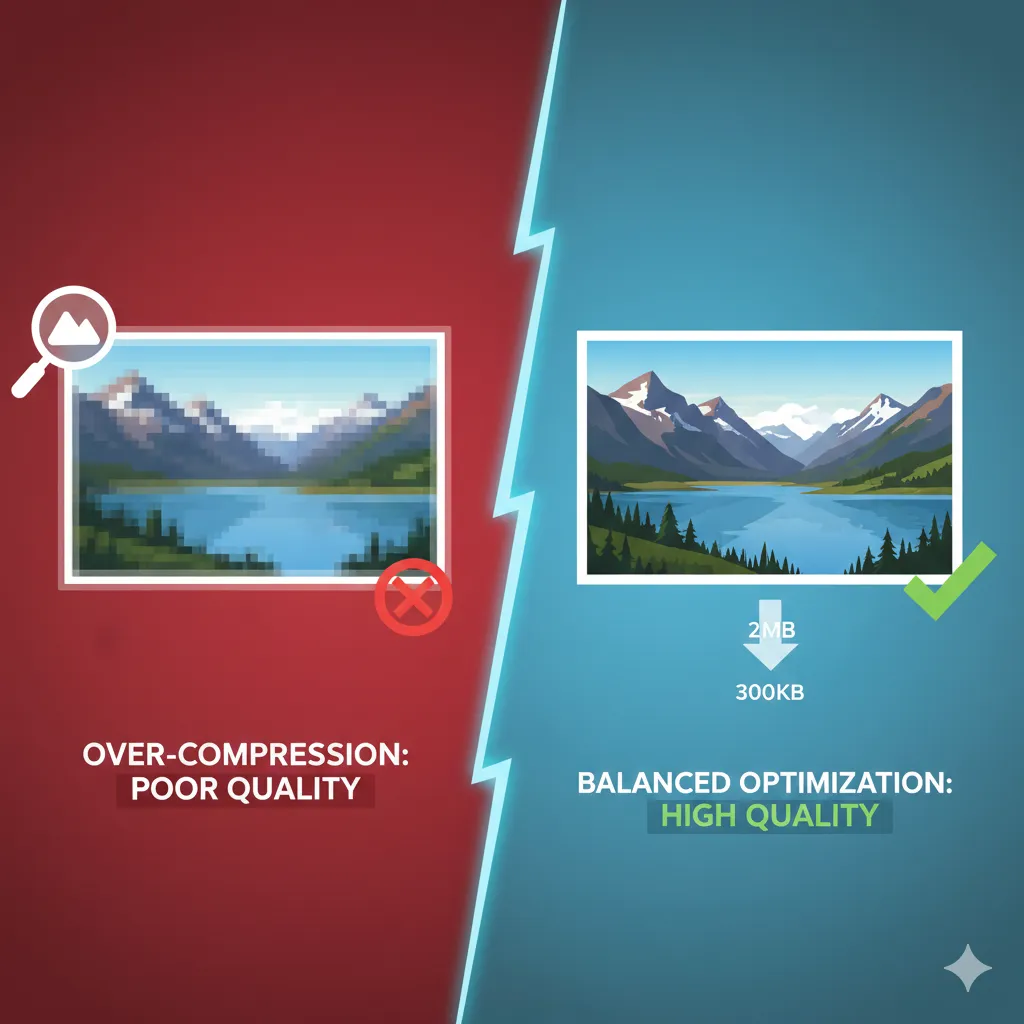
1. Over-Compression (Reducing Quality Too Much)
One of the most common mistakes is compressing an image aggressively just to achieve the smallest possible file size.
When compression levels are pushed too far:
- Images become blurry
- Fine details disappear
- Colors look washed out
- Edges appear distorted
This usually happens with JPEG images because they use lossy compression.
Instead of reducing quality blindly, aim for a balanced compression level where the visual difference is barely noticeable.
For controlled JPEG optimization: https://imgcompressors.com/jpeg
Or use the general compressor for balanced reduction: https://imgcompressors.com/image
The goal is not the smallest file — it’s the best size-to-quality ratio.
2. Repeated Compression (Compressing the Same Image Multiple Times)
Another major mistake is compressing an already compressed image again and again.
Each time you apply lossy compression:
- More data gets removed
- Quality keeps degrading
- Artifacts become visible
This is especially harmful for JPEG files.
If you need to adjust file size again, always start with the original high-quality image instead of re-compressing the previously optimized version.
For strict upload requirements like 100KB or 1MB, use targeted size compression instead of repeatedly lowering quality: https://imgcompressors.com/image-to-specific-size
3. Resizing in the Wrong Order (Resizing After Compression)
Many users compress first and resize later. This can reduce image clarity and sharpness.
The better approach is:
First, resize the image to the exact dimensions required. Then compress it to reduce file size.
When you compress a very large image and later shrink it, you waste compression effort. When you resize first, you reduce unnecessary pixels before optimizing.
If you’re working with multiple website or product images, bulk processing saves time: https://imgcompressors.com/image-all
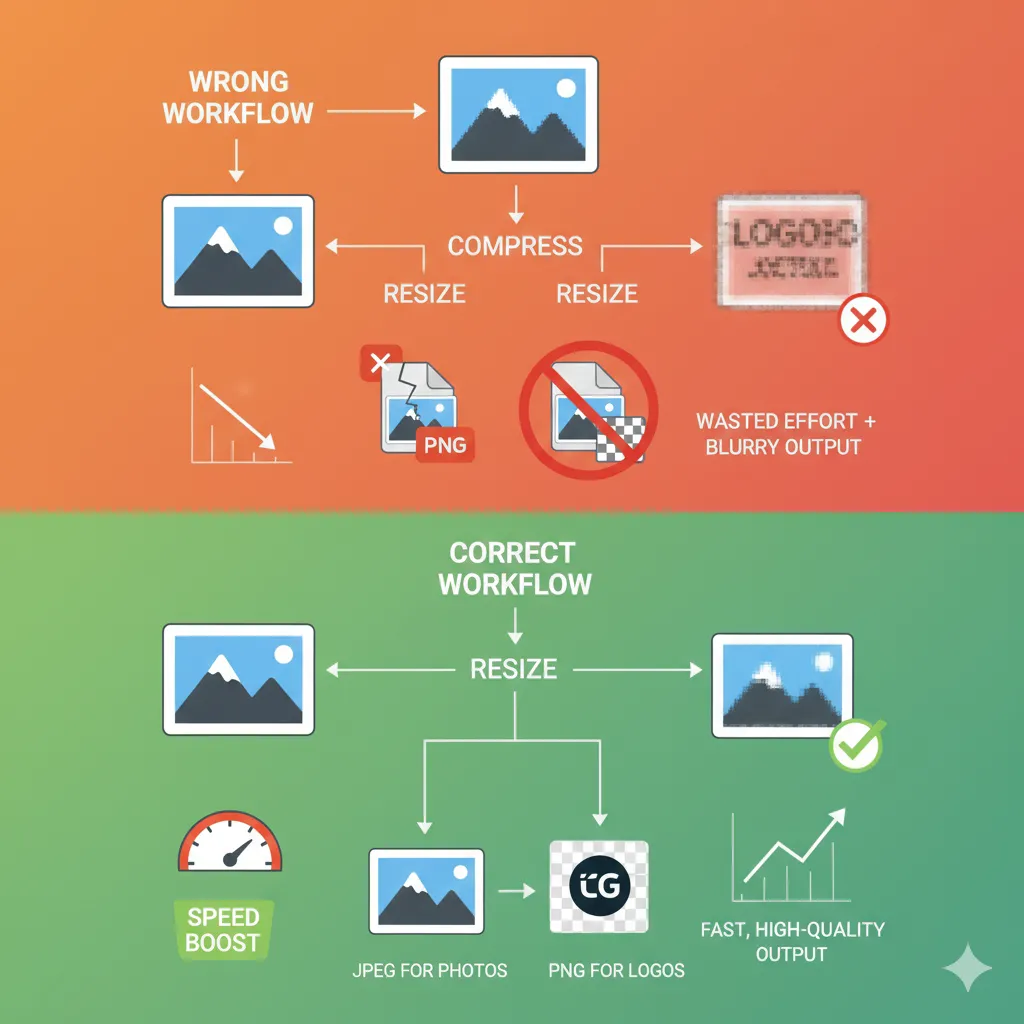
4. Choosing the Wrong Format
Format selection plays a huge role in both quality and file size.
Common mistakes include:
- Using PNG for large photographs
- Using JPEG for logos with text
- Using GIF for static images
Here’s how to avoid this:
Use JPEG for photos and realistic images: https://imgcompressors.com/jpeg
Use PNG for logos, icons, screenshots, and graphics with text: https://imgcompressors.com/png
Use GIF mainly for simple animations: https://imgcompressors.com/gif
Choosing the correct format before compressing prevents unnecessary quality damage.
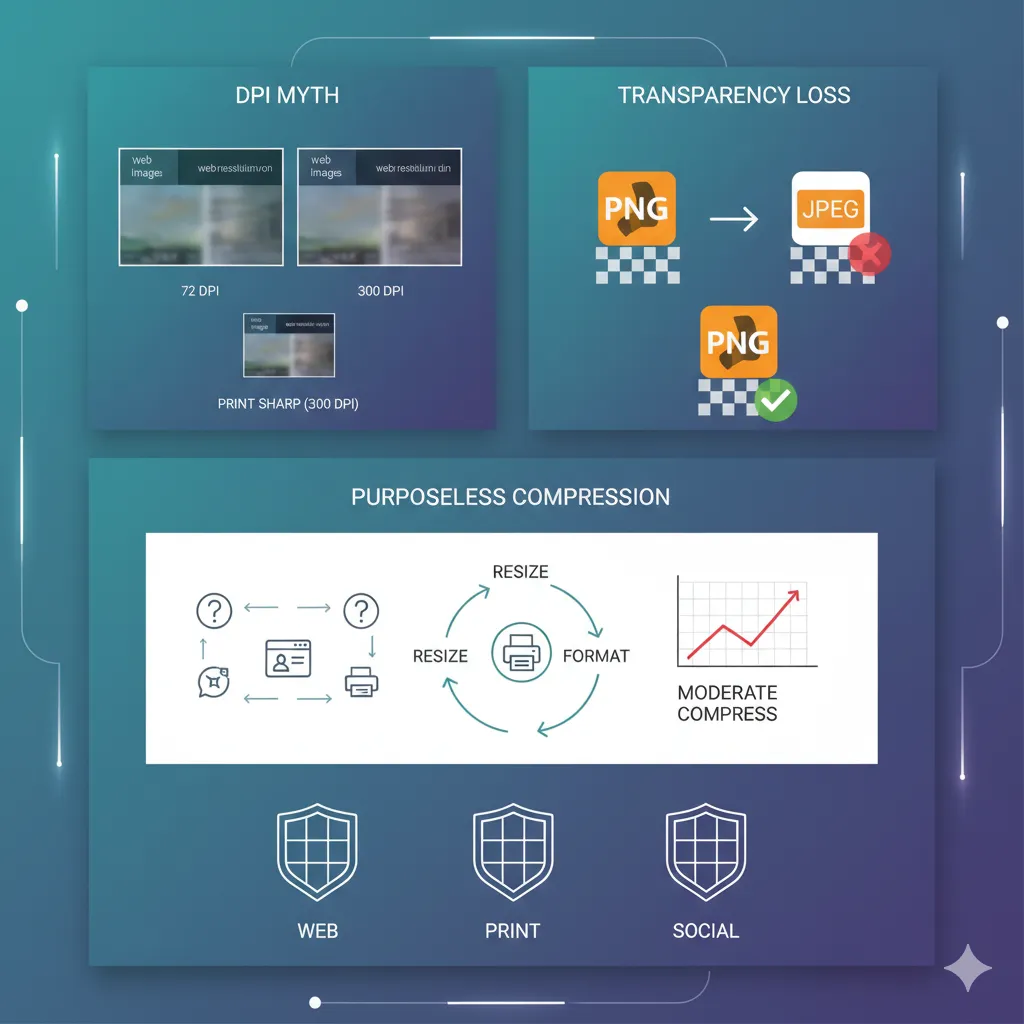
5. Ignoring DPI Settings
DPI (dots per inch) affects print quality, not web display — but many people misunderstand this.
Common mistakes:
- Keeping 300 DPI for web images
- Reducing DPI too much for printing
- Confusing DPI with resolution
For websites, DPI doesn’t impact screen quality. What matters is pixel dimensions and file size.
For printing, however, 300 DPI is generally recommended to maintain sharpness.
Instead of changing DPI blindly, adjust resolution and compress appropriately using tools that control file size precisely: https://imgcompressors.com/image
If you need to meet strict upload size limits for government portals or applications, exact-size compression is safer than lowering DPI: https://imgcompressors.com/image-to-specific-size
6. Ignoring Transparency Needs
Sometimes users convert PNG images to JPEG to reduce size — but this removes transparency and may create unwanted white backgrounds.
If your design requires transparent backgrounds, stick to PNG or WebP instead of converting to JPEG.
Optimizing properly avoids design damage.
7. Compressing Without a Purpose
One subtle mistake is compressing images without knowing the final use.
Ask yourself: Is this for a website? Is this for print? Is this for social media? Is there a strict file size requirement?
Compression settings should match the purpose.
Website images prioritize speed. Print images prioritize detail. Job portals prioritize exact file size limits.
Smart compression always starts with a goal.
Best Practice Strategy
To avoid quality loss:
Start with the original high-resolution image. Resize to required dimensions first. Choose the correct format. Apply moderate compression. Avoid re-compressing the same file repeatedly.
When you follow the correct order, you reduce file size without sacrificing clarity.
Final Thoughts
Image compression is powerful — but when done incorrectly, it permanently damages quality.
Over-compression, repeated compression, wrong format selection, and incorrect DPI adjustments are the biggest mistakes people make.
The solution is simple: compress strategically, not aggressively.